Birthday Cake Assembly
Homemade Birthday Cake?
Here are some tips.
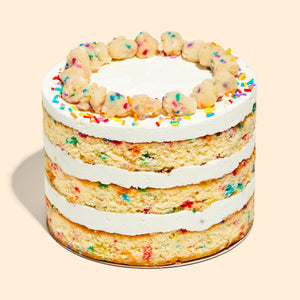
Craving Birthday Cake? We’re always happy to help. We’re breaking down exactly how we make our classic, rainbow-happy layer cake step by step, from cake and crumbs to creamy frosting.
YIELDS: Makes 1 six inch layer cake. Serves 8-12
Get this free recipe!
Create an account or log in to read the full recipe.
Birthday Cake Assembly
Birthday Cake Assembly
Step 1
Put a piece of parchment or a silpat on the counter. Invert the cake onto it and peel off the parchment or silpat from the bottom of the cake. Use the cake ring to stamp out 2 circles from the cake. These are your top 2 cake layers. The remaining cake “scrap” will come together to make the bottom layer of the cake.
Step 2 (Layer 1, the bottom)
Clean the cake ring and place it in the center of a sheet pan lined with clean parchment or a silpat. Use 1 strip of acetate to line the inside of the cake ring.
Step 3
Put the cake scraps together inside the ring and use the back of your hand to tamp the scraps together into a flat even layer.
Step 4
Dunk a pastry brush in the birthday cake soak and give the layer of cake a good, healthy bath of half of the soak.
Step 5
Use the back of a spoon to spread one-fifth of the frosting in an even layer over the cake.
Step 6
Sprinkle one-third of the birthday crumbs evenly over the frosting. Use the back of your hand to anchor them in place.
Step 7
Use the back of a spoon to spread a second fifth of the birthday cake frosting as evenly as possible over the crumbs.
Step 8 (Layer 2, the middle)
With your index finger, gently tuck the second strip of acetate between the cake ring and the top ¼ inch of the first strip of acetate, so that you have a clear ring of acetate 5 to 6 inches tall – high enough to support the height of the finished cake. Set a cake round on top of the frosting, and repeat the process for layer 1 (if 1 of your 2 cake rounds is jankier than the other, use it here in the middle and save the prettier one for the top).
Step 9 (Layer 3, the top)
Nestle the remaining cake round into the frosting. Cover the top of the cake with the remaining frosting. Give it volume and swirls, or do as we do and opt for a perfectly flat top. Garnish the frosting with the remaining birthday crumbs.
Step 10
Transfer the sheet pan to the freezer and freeze for a minimum of 12 hours to set The cake and filling. the cake will keep in the freezer for up to 2 weeks.
Step 11
At least 3 hours before you are ready to serve the cake, pull the sheet pan out of the freezer and, using your fingers and thumbs, pop the cake out of the cake ring. Gently peel off the acetate, and transfer the cake to a platter or cake stand. Let it defrost in the fridge for a minimum of 3 hours (wrapped well in plastic, the cake can be refrigerated for up to 5 days).
Step 12
Slice the cake into wedges and serve.
NO TIME TO BAKE?

You’ve never tried a birthday cake like this. Our bestselling...

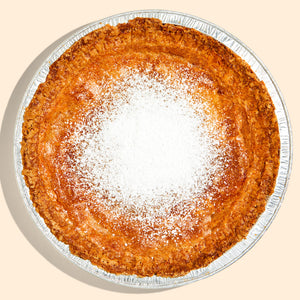
Our signature, gooey Milk Bar Pie has a sticky, buttery,...

Have a little bit of everything! This sampler pack of...


