Gooey Butter Pecan Pie
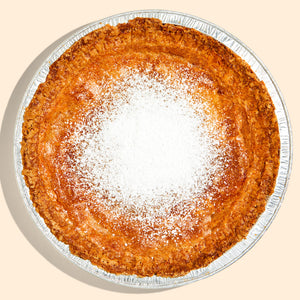
Gooey Butter Cake 🤝 Pecan Pie 🤝 Your Hopes and Dreams. This pie takes the classic you know and love and turns it up to a thousand, gooey brown sugar filling, toasted pecans, and buttery yellow cake come together for a pie unlike any other.
A note on assembly: despite the fact that we layer the cake batter on the bottom and the goo on top, a really cool bit of chemistry (physics?) happens in the oven: during baking, because of the density of the fillings, the goo sinks to the bottom, the cake rises to the middle, and the pecans remain on top becoming candied with leftover filling in the process. Science!
Get this free recipe!
Create an account or log in to read the full recipe.
Gooey Butter Pecan Pie
Classic Flaky Pie Crust
A classic no-frills flaky pie crust.
STEP 1
In your largest bowl, mix together flour, salt, and sugar until combined.
STEP 2
Add cold butter to bowl and toss with hands until the butter is coated in flour mixture.
Smash, squeeze, and break cold butter chunks with your fingers until much of the mixture resembles a coarse meal but there are still plenty of pieces of butter about the size of blueberries in the mix. Flatten some of these blueberry sized butter chunks by smearing between your palms (this will help ensure a flakey crust).
If the butter has gone soft at any point and has begun to stick to your hands, place the entire bowl into the fridge or freezer for 15 minutes to firm up. Otherwise, proceed.
STEP 3
Mix vinegar and ice water together, then add to the flour mixture one tablespoon at a time, tossing with hands in between additions.
The amount of water you will need varies — so add water until the mixture holds together when pressed into a ball, but is still a little crumbly, and isn’t sticky to the touch. You may need more than the listed amount, this is ok! Once ideal texture is reached, pour your shaggy mixture onto a lightly floured surface.
STEP 4
Fold your dough: Roll out the dough into a long rectangle-ish shape — short side facing you. The sides of your dough may have cracked a little, that is totally fine at this step.
Fold the dough like a letter: fold the far side down towards you, then the side closest to you on top of that.
Press it all back together, rotate the dough 90 degrees, then repeat the roll and fold, sprinkling with extra flour as needed to prevent sticking.
These folds are similar to what you would do to make a croissant -- this is what is going to create all your flakey layers!
Shape the dough into a rough disk, then wrap tightly in plastic wrap and place in the fridge to chill. Chill for at least an hour before use.
Pie dough can be made up to a month in advance, stored well wrapped in the freezer. Upon use, defrost in the fridge for 24 hours before rolling out.
STEP 5
Once chilled (or defrosted), preheat the oven to 350, and roll out the dough on a freshly floured surface into a circle roughly 2” wider than the tin.
Dough should be about ¼” thick — trim off any excess with scissors.
Drape the pie dough into the pie tin, ensuring it is fully lining the tin all the way to the bottom.
Fold excess dough around the edge of the tin underneath itself, to create a lip -- then crimp as desired.
Place in the freezer for at least 20 minutes, or fridge for an hour
STEP 6
Par-bake your crust: Line the inside of the pie with two pieces of foil, leaving some excess overhang around the edges to fold over your crimped crust (to prevent over-browning.) Fill the lined pie shell with pie weights, beans, or sugar, something to weigh it down.
Place lined and weighted pie onto a sheet pan, and place in the oven. Bake for 20 - 30 minutes until the crust has started to lightly brown.
STEP 7
Remove pie crust from oven and carefully remove foil and weights, set these aside to cool. Prick the bottom of the pie crust with a fork to prevent ballooning and return your pie crust to the oven for an additional 10 - 15 minutes.
We are looking for the pie crust to look slightly browned at the edges, and for the bottom of the pie to look dry, with no “wet” spots of butter. This will ensure a deeply browned and flaky crust at the end of baking, with no soggy bottom.
Cool par-baked crust to room temperature before filling with butter cake batter and pecan toffee goo.
Unfilled par-baked pie crust can be made 1-2 days ahead of time, wrapped in plastic, stored in the fridge, or, for up to a month in the freezer.
NO TIME TO BAKE?

You’ve never tried a birthday cake like this. Our bestselling...

Our signature, gooey Milk Bar Pie has a sticky, buttery,...

Have a little bit of everything! This sampler pack of...


