From Tosi: My favorite offering at Milk Bar is our cake truffles, spawned entirely from leftover bits and pieces of cake! You can choose to follow the recipe, or get crazy, without our guidance, using leftovers to concoct your own. Don’t limit yourself to birthday cake; you can use any cake scrap and any leftover fillings, crumbs, or crunches from your kitchen!
YIELDS: Makes about one dozen 1-ounce cake truffles
TIME:
Get this free recipe!
Create an account or log in to read the full recipe.
B'Day Truffles
INTRO
We've got 4 recipes for the various parts of the truffles. Get ready...
1. BIRTHDAY CAKE
INGREDIENTS
55 g butter, at room temperature (4 tablespoons, 1/2 stick)
60 g vegetable shortening (1/3 cup)
250 g granulated sugar (1 1/4 cups)
50 g light brown sugar (3 tablespoons, tightly packed)
3 eggs
110 g buttermilk (1/2 cup)
65 g grapeseed oil (1/3 cup)
8 g clear vanilla extract (2 teaspoons)
245 g cake flour (2 cups)
6 g baking powder (1 1/2 teaspoons)
3 g kosher salt (3/4 teaspoon)
50 g rainbow sprinkles (1/4 cup)
plus
25 g rainbow sprinkles (2 tablespoons)
YIELDS
1 quarter sheet pan
STEP 1
Heat the oven to 350°f.
STEP 2
Combine the butter, shortening, and sugars in the bowl of a stand mixer fitted with the paddle attachment and cream together on medium-high for 2 to 3 minutes. Scrape down the sides of the bowl, add the eggs, and mix on medium-high for 2 to 3 minutes. scrape down the sides of the bowl once more.
STEP 3
On low speed, stream in the buttermilk, oil, and vanilla. increase the mixer speed to medium-high and paddle for 4 to 6 minutes, until the mixture is practically white, twice the size of your original fluffy butter-and-sugar mixture, and completely homogeneous. don’t rush the process. You’re basically forcing too much liquid into an already fatty mixture that doesn’t want to make room for that liquid. There should be no streaks of fat or liquid. Stop the mixer and scrape down the sides of the bowl.
STEP 4
On very low speed, add the cake flour, baking powder, salt, and the 50 g (¼ cup) rainbow sprinkles. Mix for 45 to 60 seconds, just until your batter comes together. Scrape down the sides of the bowl.
STEP 5
Pam-spray a quarter sheet pan and line it with parchment, or just line the pan with a silpat. Using a spatula, spread the cake batter in an even layer in the pan. Sprinkle the remaining 25g (2 tablespoons) rainbow sprinkles evenly on top of the batter.
STEP 6
Bake the cake for 30 to 35 minutes. The cake will rise and puff, doubling in size, but will remain slightly buttery and dense. At 30 minutes, gently poke the edge of the cake with your finger: the cake should bounce back slightly and the center should no longer be jiggly. Leave the cake in the oven for an extra 3 to 5 minutes if it doesn't pass these tests.
STEP 7
Take the cake out of the oven and cool on a wire rack or, in a pinch, in the fridge or freezer (don't worry, it's not cheating). The cooled cake can be stored in the fridge, wrapped in plastic wrap, for up to 4 days.
2. VANILLA MILK
INGREDIENTS
55 g milk (1/4 cup)
4 g clear vanilla extract (1 teaspoon)
STEP 1
Whisk together the milk and vanilla in a small bowl.
NOTE ON VANILLA EXTRACT
We use two different kinds of vanilla extract, brown patisse brand and clear McCormick brand. Neither is of any fancy caliber, but we use these specific vanilla extracts on purpose because they are the flavor that most people relate to in their baked goods. Vanilla beans and fancy vanilla paste do not taste like home to me, but commercial vanilla extract does.
We use brown (standard) vanilla extract in 90 percent of our baked goods. It’s the extract that flavors nearly every homemade chocolate chip cookie. We use clear McCormick vanilla extract for the birthday cake, birthday cake crumb, and birthday cake frosting. It is vanilla in flavor, but not flavored by any actual vanilla beans. It’s “vanilla” in more of a guilty tub-of-frosting, box-cake way. The two are not interchangeable in recipes. Both patisse brown extract and McCormick clear vanilla are available online.
3. White Chocolate Coating
INGREDIENTS
350 g white chocolate (melted)
10 g grapeseed oil (or other neutral oil)
STEP 1
In a small bowl, whisk together the melted white chocolate and oil until homogeneous. Keep warm, or re-melt if necessary before using.
4. BIRTHDAY SAND
INGREDIENTS
1/4 cup granulated sugar
1 tablespoon light brown sugar, tightly packed
2/3 cup cake flour
1/4 teaspoon baking powder
1/4 teaspoon kosher salt
1 tablespoon rainbow sprinkles
1 tablespoon grapeseed oil
1 teaspoon clear vanilla extract
STEP 1
Heat the oven to 300°f.
STEP 2
Combine the sugars, flour, baking powder, salt, and sprinkles in the bowl of a stand mixer fitted with the paddle attachment and mix on low speed until well combined.
STEP 3
Add the oil and vanilla and paddle again to distribute. The wet ingredients will act as glue to help the dry ingredients form small sandy clusters; continue paddling until that happens.
STEP 4
Bake for 15 minutes
STEP 5
Let the crumbs cool completely before using. Grind down in a food processor if the crumbs are not small and sandy enough (they will not glue to the white chocolate coating in the birthday cake truffle recipe!) Stored in an airtight container, the sand will keep fresh for 1 week at room temperature or 1 month in the fridge or freezer.
5. ASSEMBLY INSTRUCTIONS
STEP 1
Combine the cake scraps and vanilla milk in a medium sized bowl and toss with your hands until moist enough to knead into a ball. If it is not moist enough to do so, add up to 2 tablespoons more vanilla milk and knead it in.
STEP 2
Using a small ice cream scoop, portion out 12 even balls, each half the size of a ping-pong ball. Roll each one between the palms of your hands to shape and smooth it into a round sphere.
STEP 3
With latex gloves on, put 2 tablespoons of the white chocolate in the palm of your hand and roll each ball between your palms, coating it in a thin layer of melted chocolate; add more chocolate as needed.
STEP 4
Put 3 or 4 chocolate-covered balls at a time into the bowl of birthday cake sand. Immediately toss them with the crumbs to coat, before the chocolate shell sets and no longer acts as a glue (if this happens, just coat the ball in another thin layer of melted chocolate).
STEP 5
Refrigerate for at least 5 minutes to fully set the chocolate shells before eating or storing. In an airtight container, the truffles will keep for up to 1 week in the fridge.
NO TIME TO BAKE?

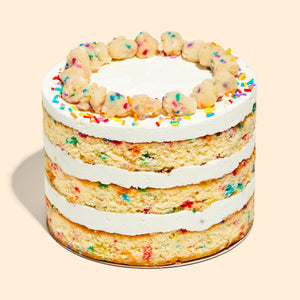
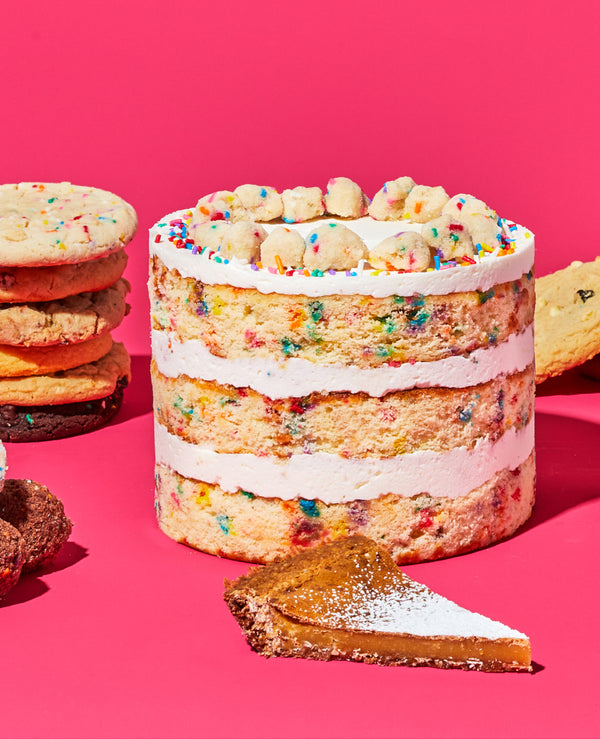
Birthday Cake
Our bestselling Birthday Cake has three tiers of rainbow-flecked vanilla...

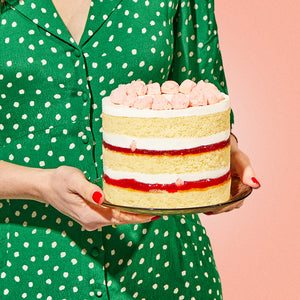
Strawberry Shortcake Cake
Strawberry Shortcake but on a whole new level: vanilla cake...

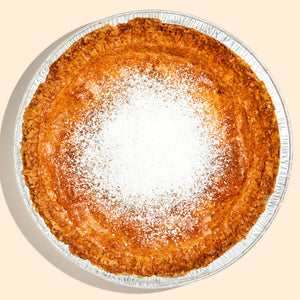
Milk Bar® Pie
Our signature, gooey Milk Bar Pie has a sticky, buttery,...

Red Velvet Cheesecake Cake
Our Red Velvet Cheesecake ups the ante on decadence with...